

Approve your visitors in just a couple of clicks! 📲
Here’s how to manage visits at Munily
to make the process easier and safer for you.
How do I perform pre-registration for a visitor?
Let your community’s security guard know in advance who will be visiting you. This will make the entry process much easier.
Steps for pre-registration of visitors:
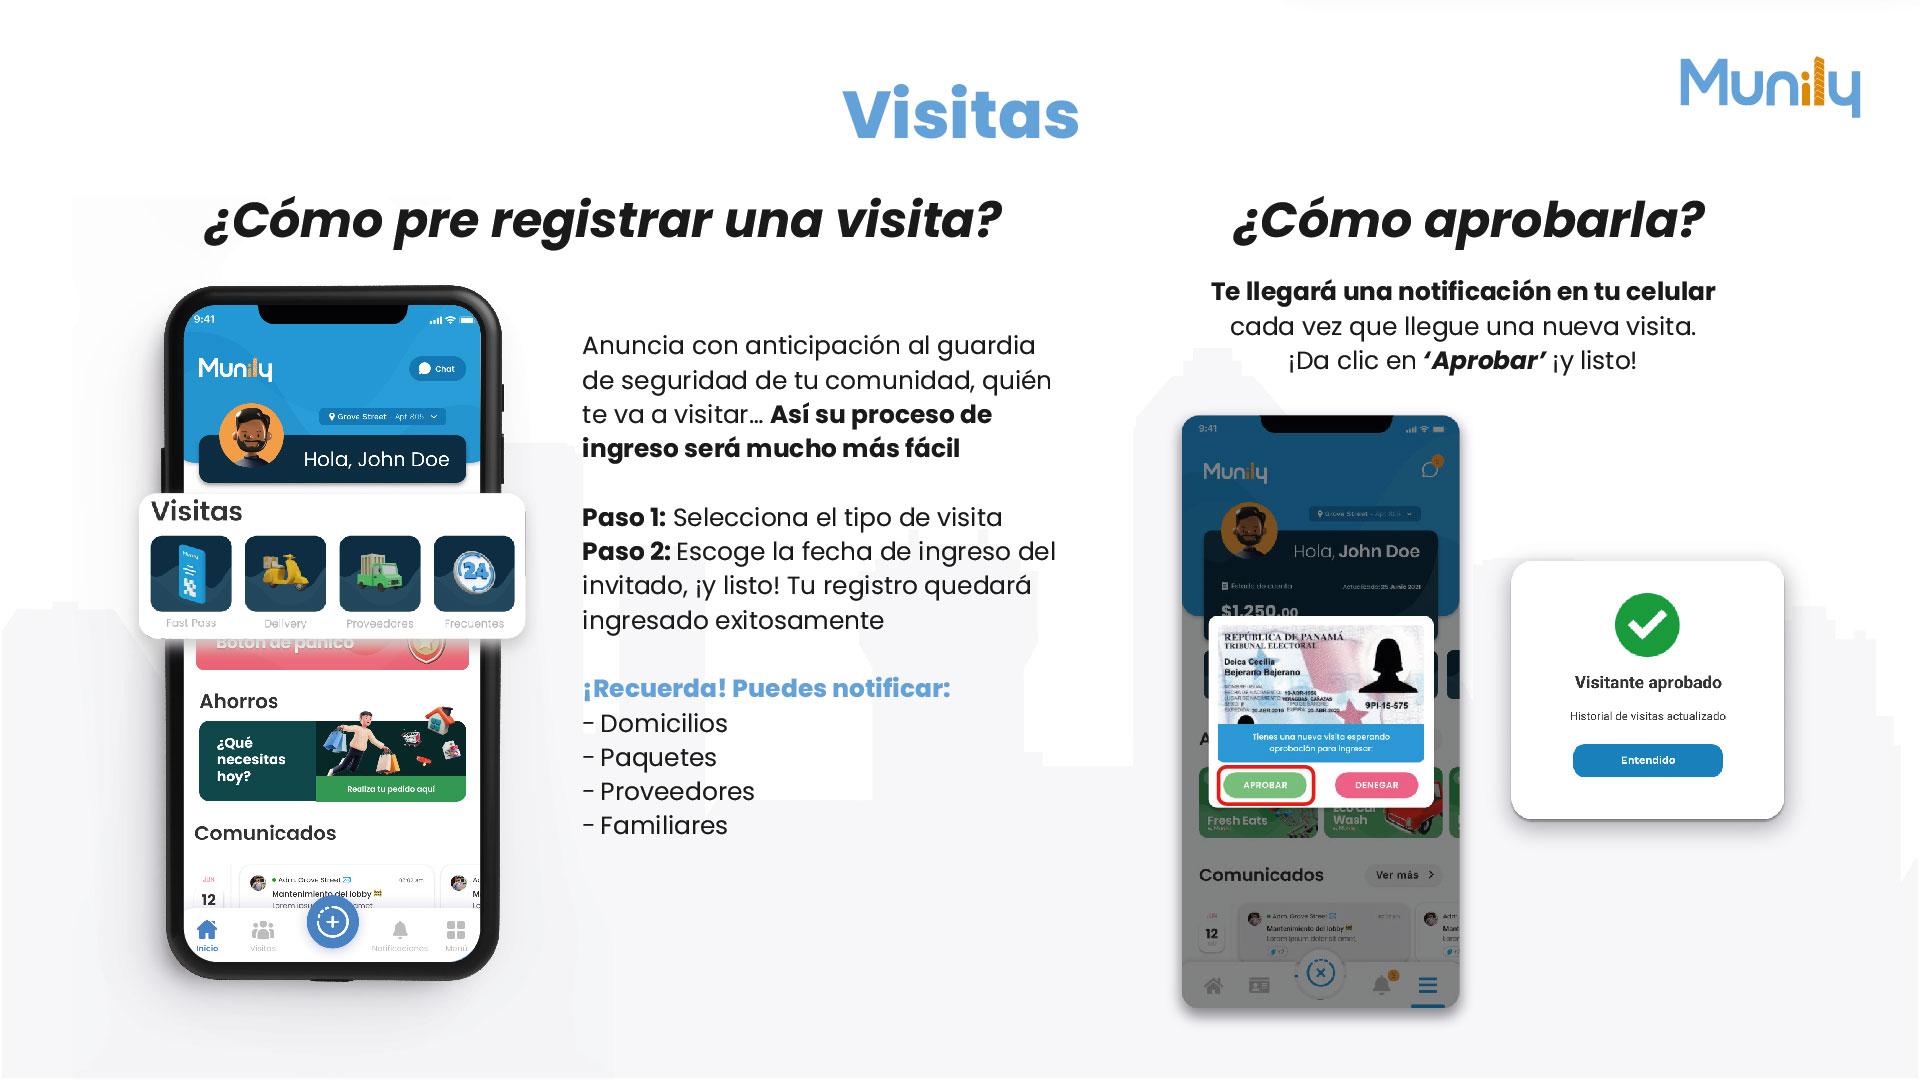
- Select the type of visit: In the “Visitas (Visits)
” section, you’ll find different options such as “Fast Pass,” “Delivery (Delivery)
,” “Service Providers,” and “Frecuentes (Frequent)
.” Tap the icon that best describes the visit. - Choose the entry date: Once you’ve selected the visit type, you can choose the date you expect the visitor to enter.
And that’s it! Your registration will be successfully submitted.
Remember! You can notify:
- Delivery Addresses
- Paquetes (Packages)
- Service Providers
- Family Members
How to approve it?
You’ll receive a notification on your cell phone every time a new visitor arrives. Tap “Approve” and you’re all set!
Steps to approve a visitor:
- Receive the notification: When a visitor arrives, you’ll receive an alert on your mobile device.
- Open the notification: Tap the notification to view the visitor’s details.
- Review the information: On the screen, you’ll see the visitor’s information, including their photo and relevant details.
- Tap “APPROVE”: If everything looks good, tap the green button that says “APPROVE.”
- Confirmation: You’ll see a message stating “Visitor approved” and that the “visitor Historial (History)
s been updated.” Tap “Understood” to close the confirmation.
This way, the security guard will be notified and can quickly and securely grant the visitor access.
Guide images
Still need help? Reach us on WhatsApp or at soporte@munily.com.
Con Amor 💙 Munily