

How do you send a notice or announcement to your community? 🪧
Here's how to send a notice or announcement to your community through Munily:
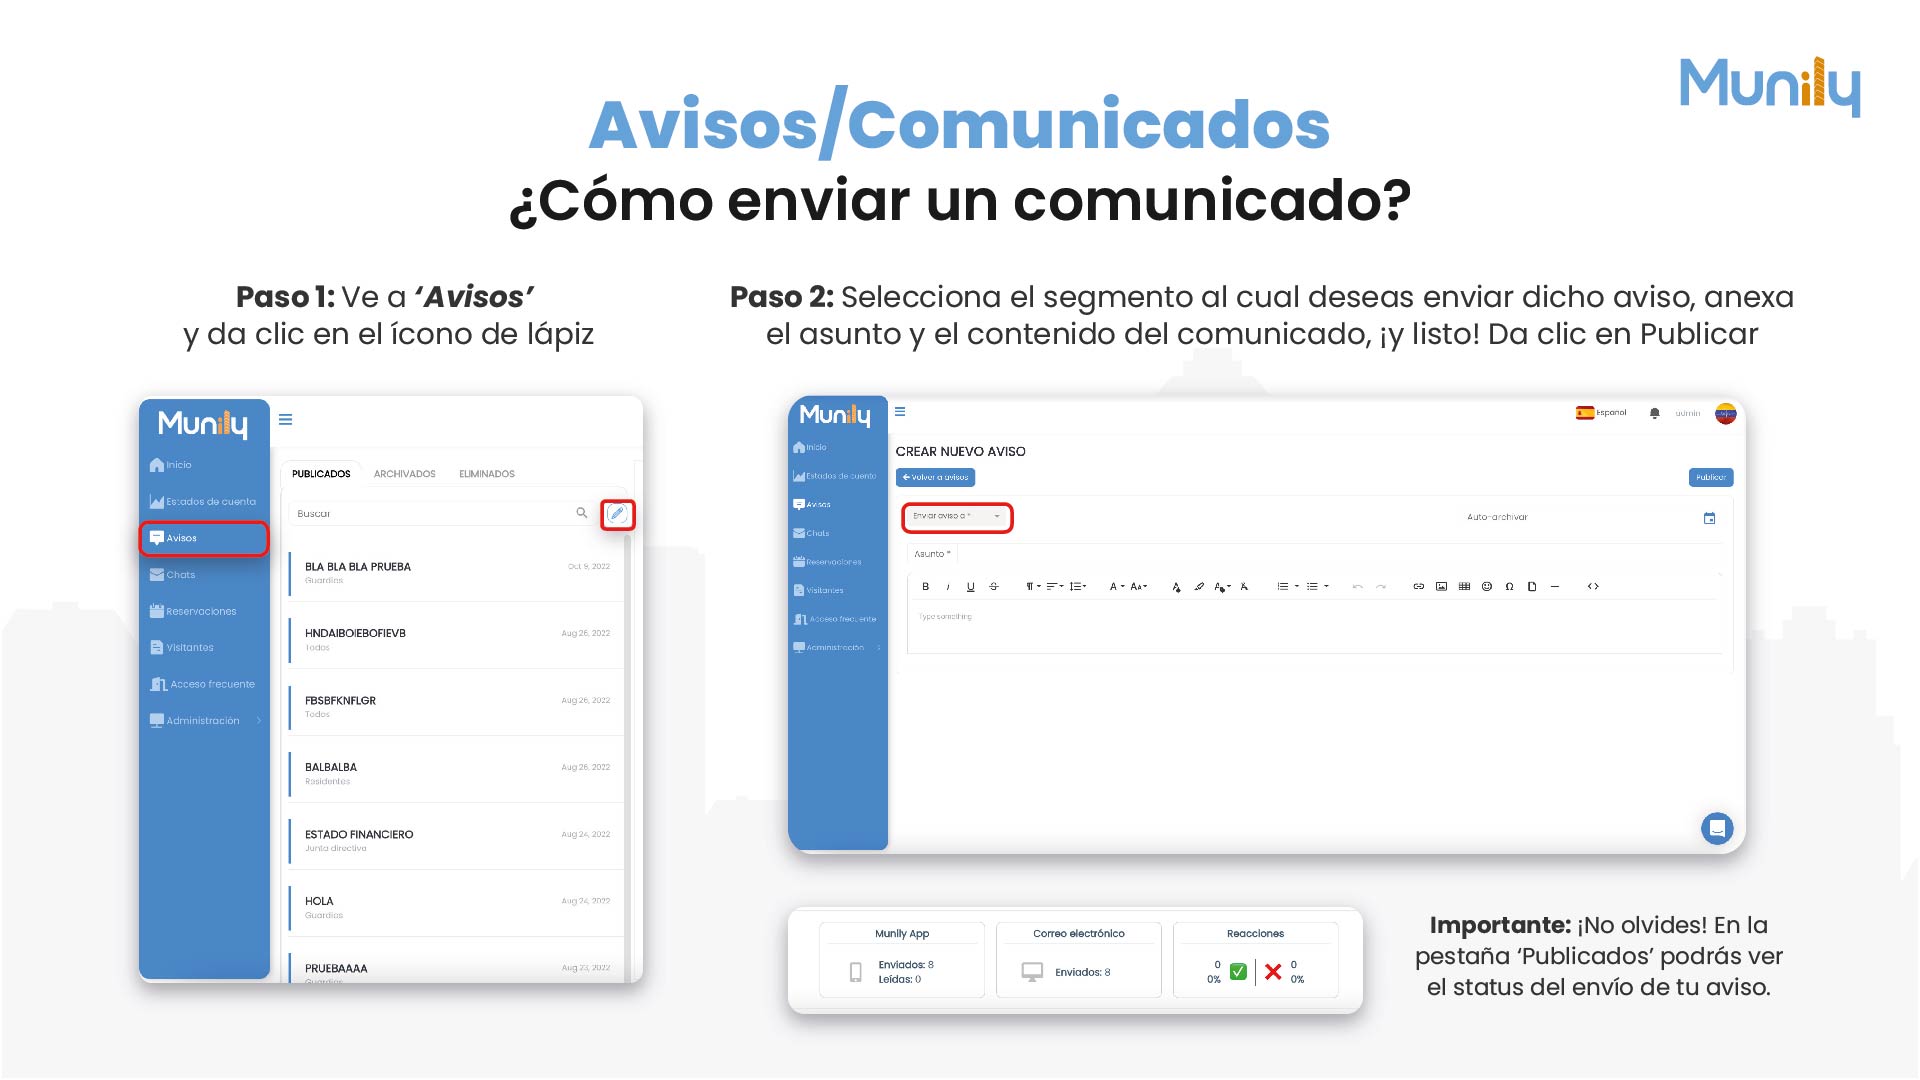
Step 1: Go to the Avisos (Notices) section and create a new one.
- In the left-hand sidebar, find and click the "Avisos" option. You’ll see a list of previously published notices.
- To create a new notice, click the pencil icon located at the top right of the notice list.
Step 2: Configure and draft your notice.
- Once you’ve clicked the pencil icon, the "CREATE NEW NOTICE" screen will open.
- In the "Send notice to" section, select the segment of your community to which you want to direct the notice. You can expand the list to view the available options.
- In the "Subject" field, enter a clear and concise title for your notice.
- In the main text area, write the content of your notice. Formatting tools are available to enhance the presentation of your message (bold, italics, alignment, lists, etc.).
- If you wish, you can set "Auto-Archive" so that the notice is automatically archived after a specified period of time.
Step 3: Post your notice.
- Once you’ve completed the subject line and content of your announcement, click the "Post" button located in the upper-right corner of the screen.
Additional Information:
- At the top of the notice creation screen, you’ll find a button labeled "Back to Notices" if you need to return to the list without saving.
- In the top-right corner of the screen, you can see the language option "Spanish" and your username.
- Below the notice composition section, you’ll find a summary of the notice’s delivery status.
Important: Don’t forget! On the "Published" tab, you can view the delivery status of your notice.
Guide images
Still need help? Reach us on WhatsApp or at soporte@munily.com.
Con Amor 💙 Munily