

How do I create a Acceso Frecuente?
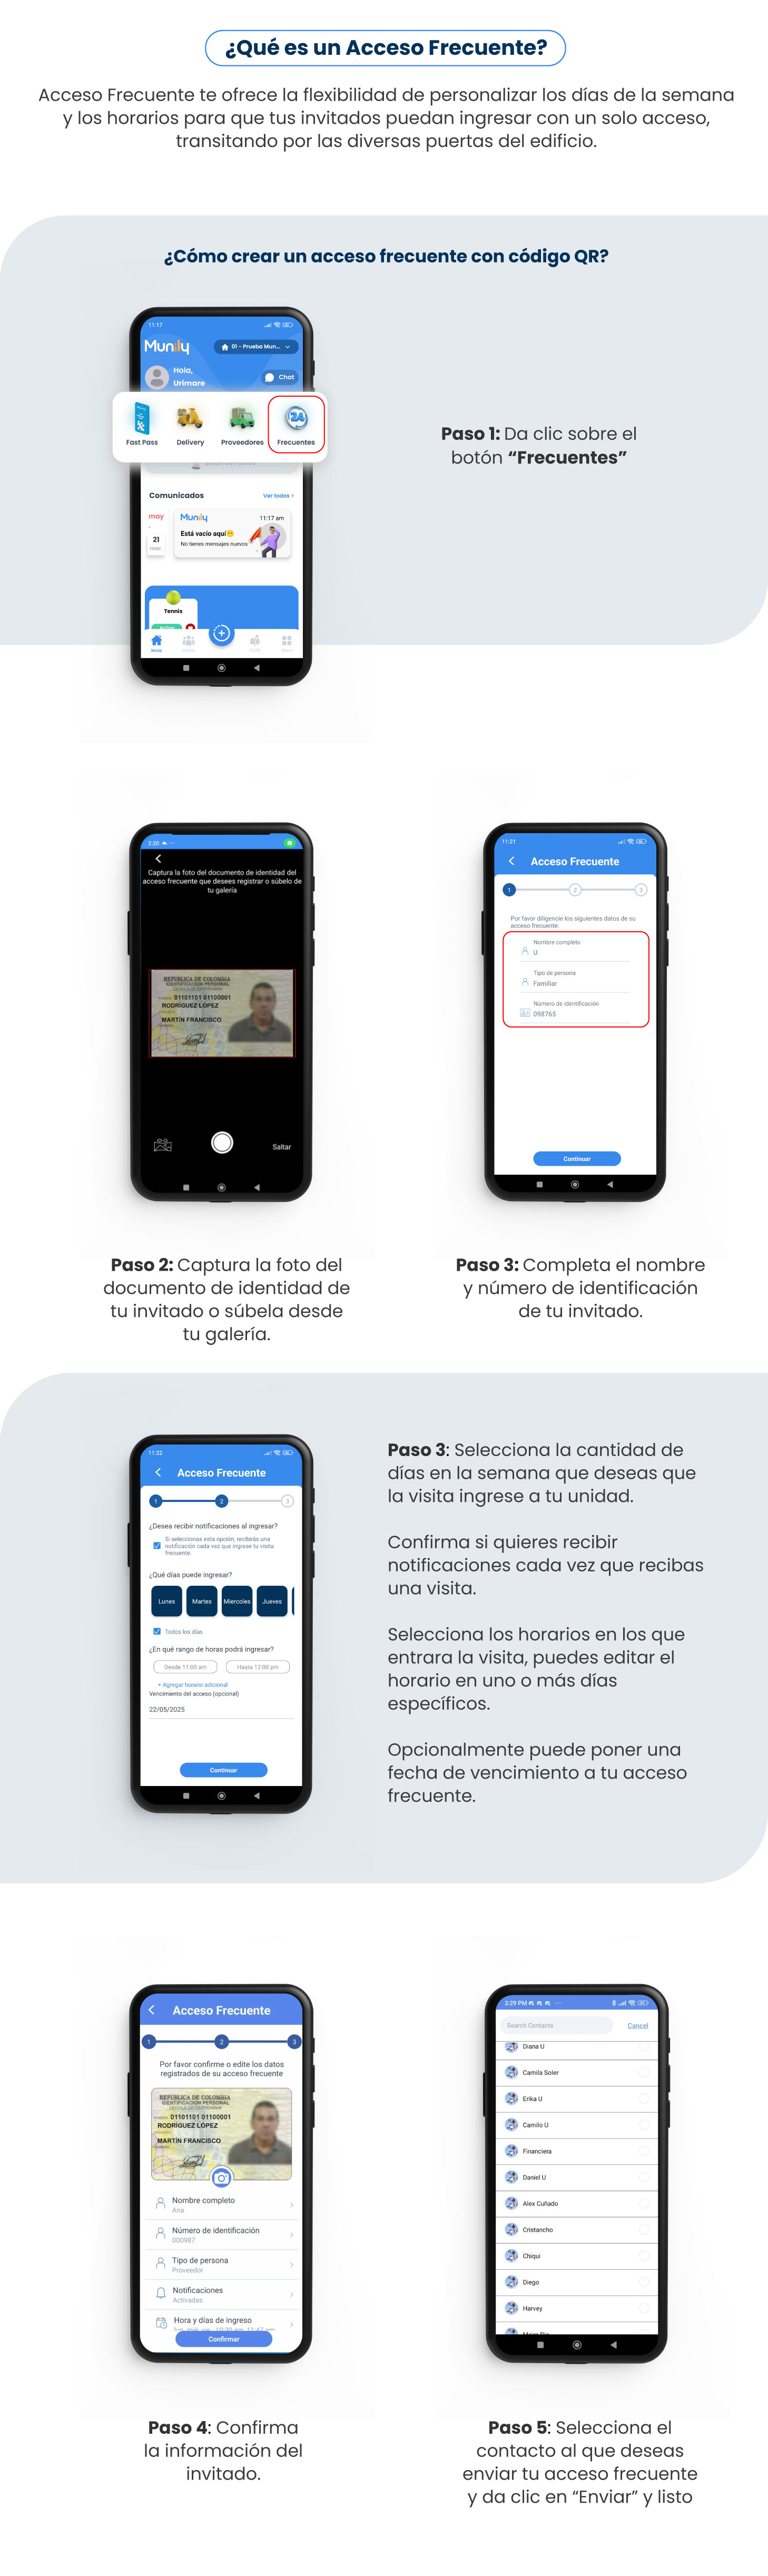
What is a “Acceso Frecuente (Frequent Access)”?
Acceso Frecuenteoffers you the flexibility to customize the days of the week and times so your guests can enter with a single access pass, moving through the building’s various doors.
How do I create a “frequent access pass” with a QR code?
Follow these steps to create a frequent access pass:
Step 1: Click the “Frecuentes (Frequent)” button
On the main screen of the Munily app, you’ll see a menu bar at the top. Click the “Frecuentes” option.
Step 2: Take a photo of your guest’s ID or upload it from your gallery.
- A screen will appear for taking a photo of the ID.
- You can take a photo directly by pointing the camera at the ID.
- Alternatively, you can select an existing photo from your gallery by clicking the gallery icon in the lower-left corner.
- Once you have the photo, press the circular button to capture it. If you want to skip this step, you can click "Skip".
Step 3: Enter your guest’s name and ID number.
- On the “Acceso Frecuente” screen, you’ll see fields to enter your guest’s information.
- Enter the guest’s Full Name.
- Select the Type of person (for example, Family Member, Proveedor (Service Provider), etc.).
- Enter the guest’s ID number.
- Click the "Continue" button to proceed.
Step 4: Confirm the guest’s information.
- On this screen, you can review and edit the information you’ve entered for your frequent access pass.
- You’ll see the photo of the ID document you uploaded.
- You can confirm or edit the Full Name, ID Number, Person Type, and Notifications.
- You can also configure the Entry Times and Days. Here, you can select the days of the week and the time range during which your guest will be able to enter.
- Optionally, you can set an expiration date for the frequent access pass.
- Once you’ve reviewed all the information, click the “Confirm” button.
Step 5: Select the contact you want to send your frequent access pass to, click “Send,” and you’re done.
- A list of your contacts will appear.
- Find and select the contact for the person you want to send the frequent access pass to.
- Click the "Send" button.
- Done! Your frequent access pass has been created and sent.
Guide images
Still need help? Reach us on WhatsApp or at soporte@munily.com.
Con Amor 💙 Munily