

How do I record visitor information? 📱
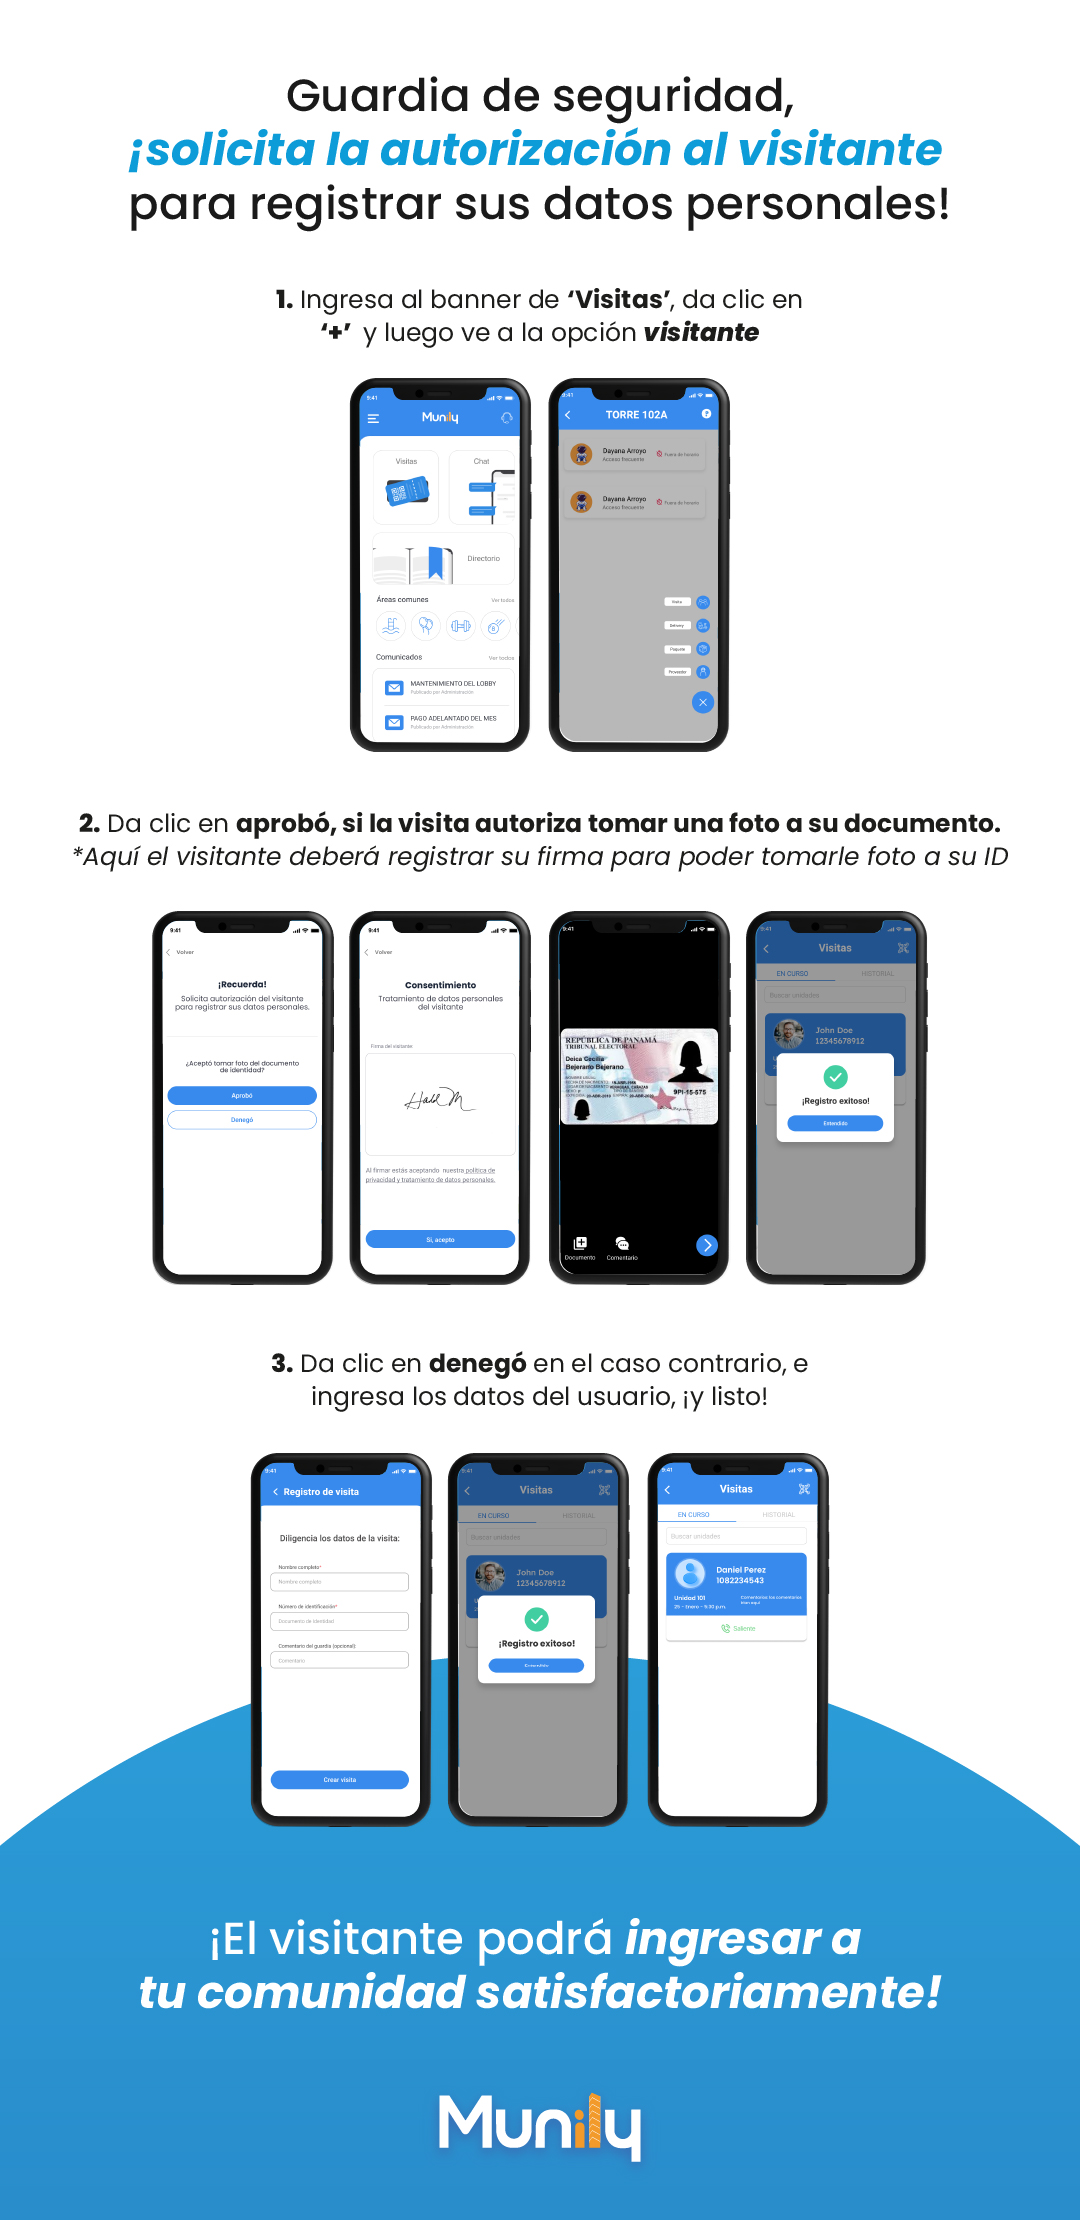
Security guard, ask the visitor for permission to record their personal information!
Follow these steps to properly register your visitors:
1. Go to the 'Visitas (Visits)' banner
Click the '+' icon and then select the "Visitor" option.
- On the app’s main screen, you’ll see a banner with the option “Visitas.” Tap it.
- Once inside the “Visitas” section, look for the button with the plus sign (+) and tap it.
- A menu will appear; select the "Visitor" option.
2. If the visitor authorizes you to take a photo of their ID
Here, the visitor must provide their signature so you can take a photo of their ID.
You’ll see a screen titled “Remember!” with the prompt: “Request the visitor’s authorization to record their personal information.”
Ask the visitor: “Do you agree to have your ID photographed?”
If the visitor agrees, press the "Approved" button.
If the visitor does not agree, press the "Denied" button.
If the visitor approved:
- The "Consent" screen will appear with the title "Processing of the Visitor’s Personal Data."
- Ask the visitor to "Sign here" in the designated space.
- Once the visitor has signed, they must read the text: "By signing, you are accepting our privacy policy and personal data processing policy."
- Finally, the visitor must click the "Yes, I accept" button.
- Next, an image of the visitor’s ID will be displayed.
- On the “Visitas” screen, you’ll see the registered visitor’s information, along with a message saying “Registration successful!”. Click “Understood”.
3. If the visitor refused to have their ID photographed
In this case, you’ll need to enter the user’s information manually—and that’s it!
- If the visitor did not authorize a photo of their ID, click the "Declined" button in the previous step.
- The "Visitor Registration" screen will open.
- You’ll need to fill out the following fields:
- Full Name: Enter the visitor’s full name.
- ID Number: Enter the visitor’s ID number.
- Security guard’s comment (optional): You can add a comment if you deem it necessary.
- Once you’ve filled in the information, click the "Create Visit" button.
- On the "Visitas" screen, you’ll see the registered visitor’s information, along with a message stating "Registration successful!". Click "Understood".
The visitor will now be able to enter your community!
Guide images
Still need help? Reach us on WhatsApp or at soporte@munily.com.
Con Amor 💙 Munily