

How do you add a new resident to your community? 🔎
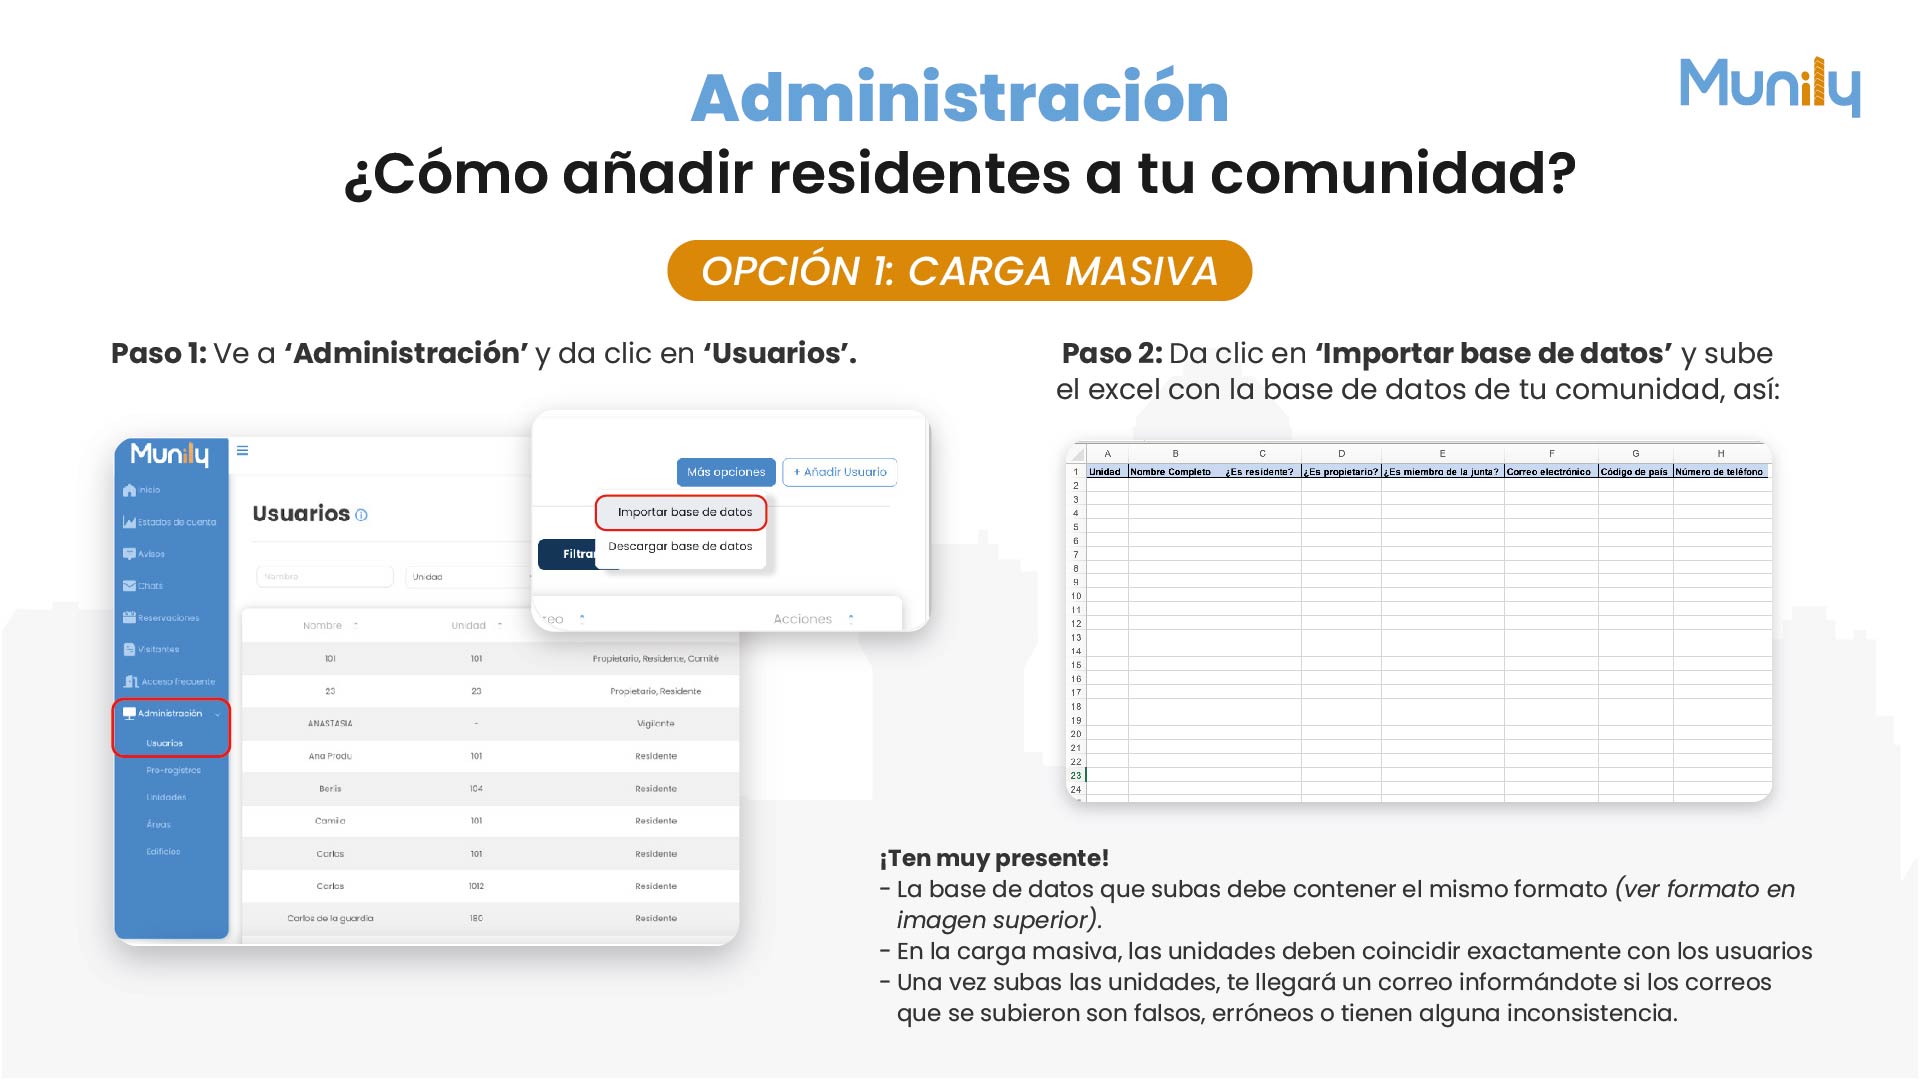
To add new residents to your community in bulk, follow these steps:
OPTION 1: BULK UPLOAD
Step 1: Go to the "Administración (Administration)" section
- In the left-hand sidebar, find and click Administración.
- Under the “Administración” options, click Usuarios (Users).
Step 2: Import your database
Once in the “Usuarios” section, click the More options button.
A menu will appear. Select the Import Database option.
Next, you’ll need to upload your Excel file containing your community’s database. The format must be as follows:
- Column A: Unit
- Column B: Full Name
- Column C: Is this person a resident?
- Column D: Is this person a homeowner?
- Column E: Is this person a board member?
- Column F: Email
- Column G: Country Code
- Column H: Phone Number
Please keep this in mind!
- The database you upload must follow the exact format shown in the image.
- During bulk upload, the units must exactly match the users already registered in your community.
- Once you upload the units, you’ll receive an email informing you if any of the uploaded email addresses are invalid, incorrect, or contain any inconsistencies.
Here’s how to add a new resident to your community individually.
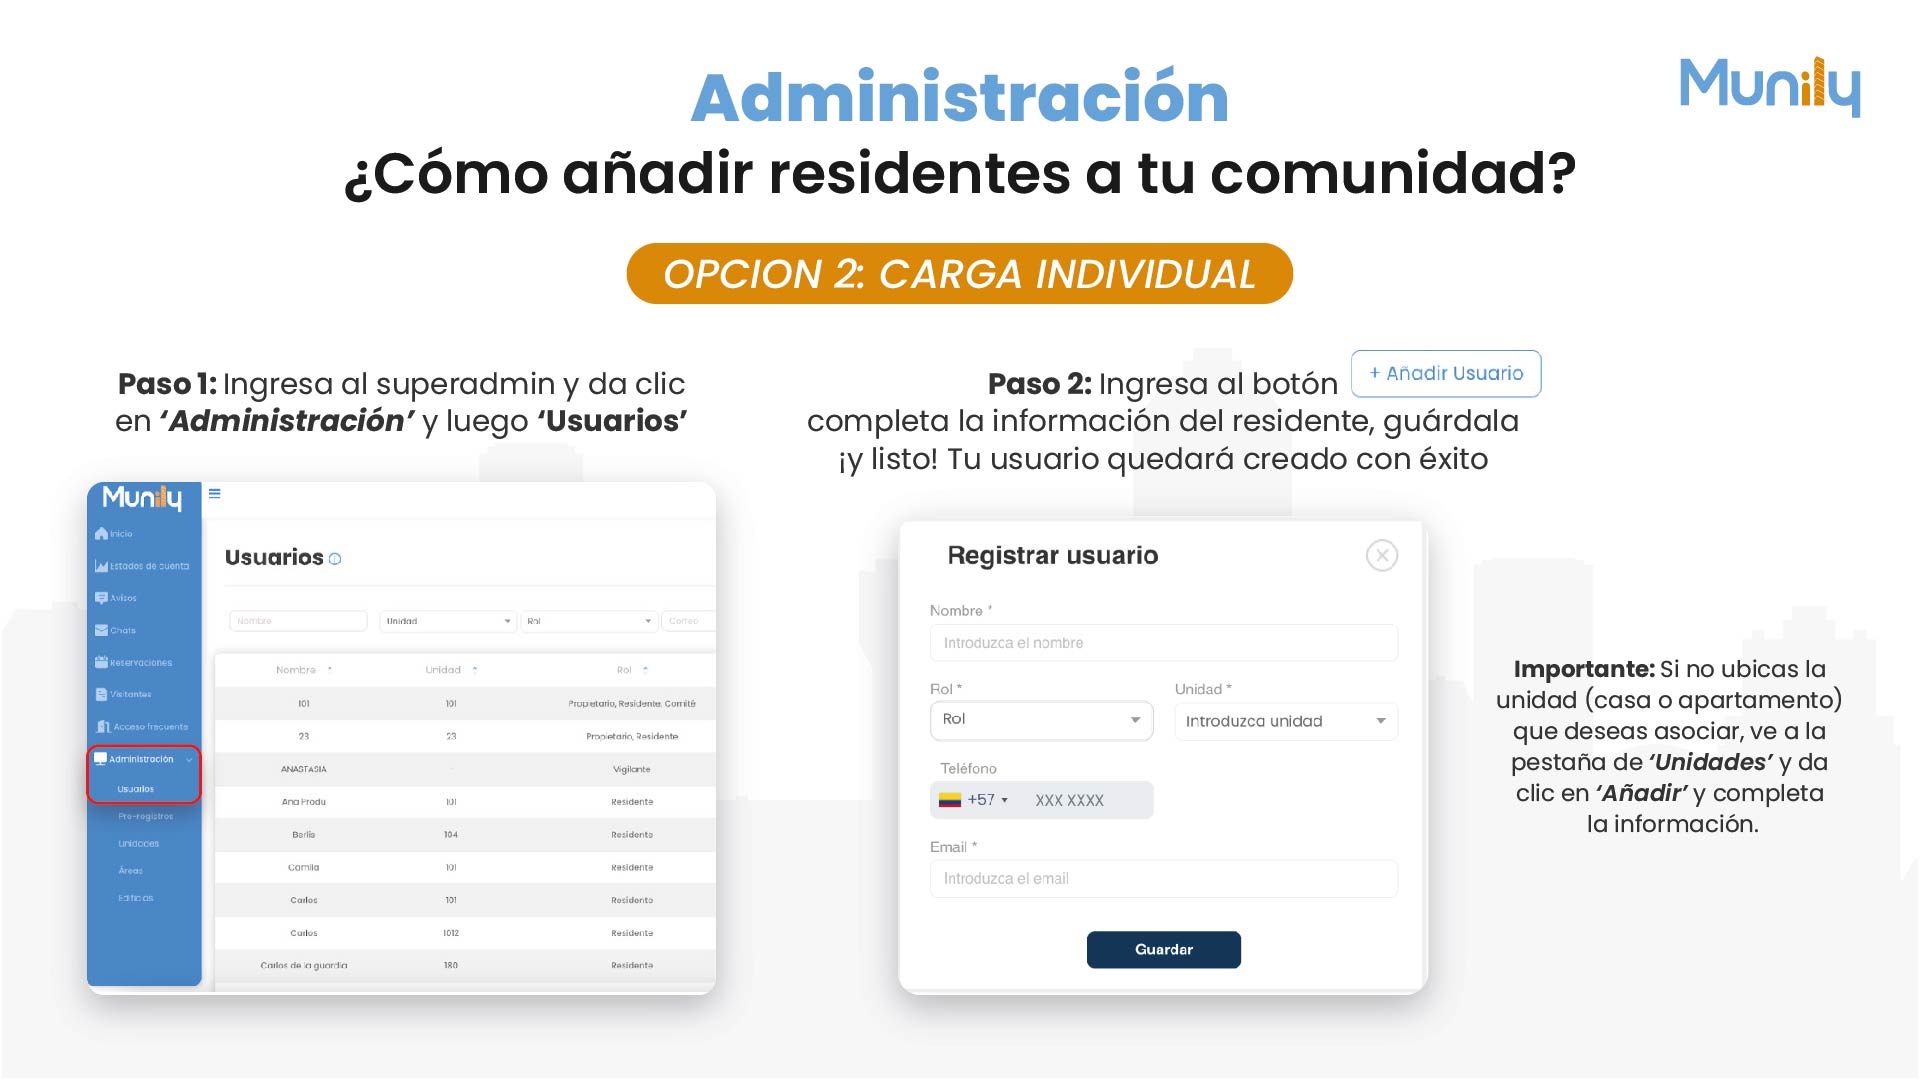
OPTION 2: INDIVIDUAL UPLOAD
Step 1: Log in to SuperAdmin and click “Administración,” then “Usuarios”
- In the left-hand sidebar, look for the Administración section.
- Under Administración, select the Usuarios option. You’ll see a list of existing residents in your community.
Step 2: Click the '+ Add Resident' button and fill in the resident’s information. Save it, and you’re done! Your user has been successfully created.
- Once in the Usuarios section, locate and click the + Add User button.
- A form titled Register User will appear.
- Fill out the following fields:
- Name: Enter the resident’s full name.
- Role: Select the user’s role in the community (for example, Homeowner, Resident, Security Guard, etc.).
- Unit: Enter the number or identifier of the unit (house or apartment) assigned to the resident.
- Phone: Enter the resident’s phone number. The country code (+57) will already be selected by default for Colombia.
- Email: Enter the resident’s email address.
- After filling in all the information, click the Save button.
Important: If you cannot find the unit (house or apartment) you want to associate, go to the "Unidades (Units)" tab, click "Add", and fill in the information.
Here’s how to add a new resident to your community using the pre-registration option at Munily.
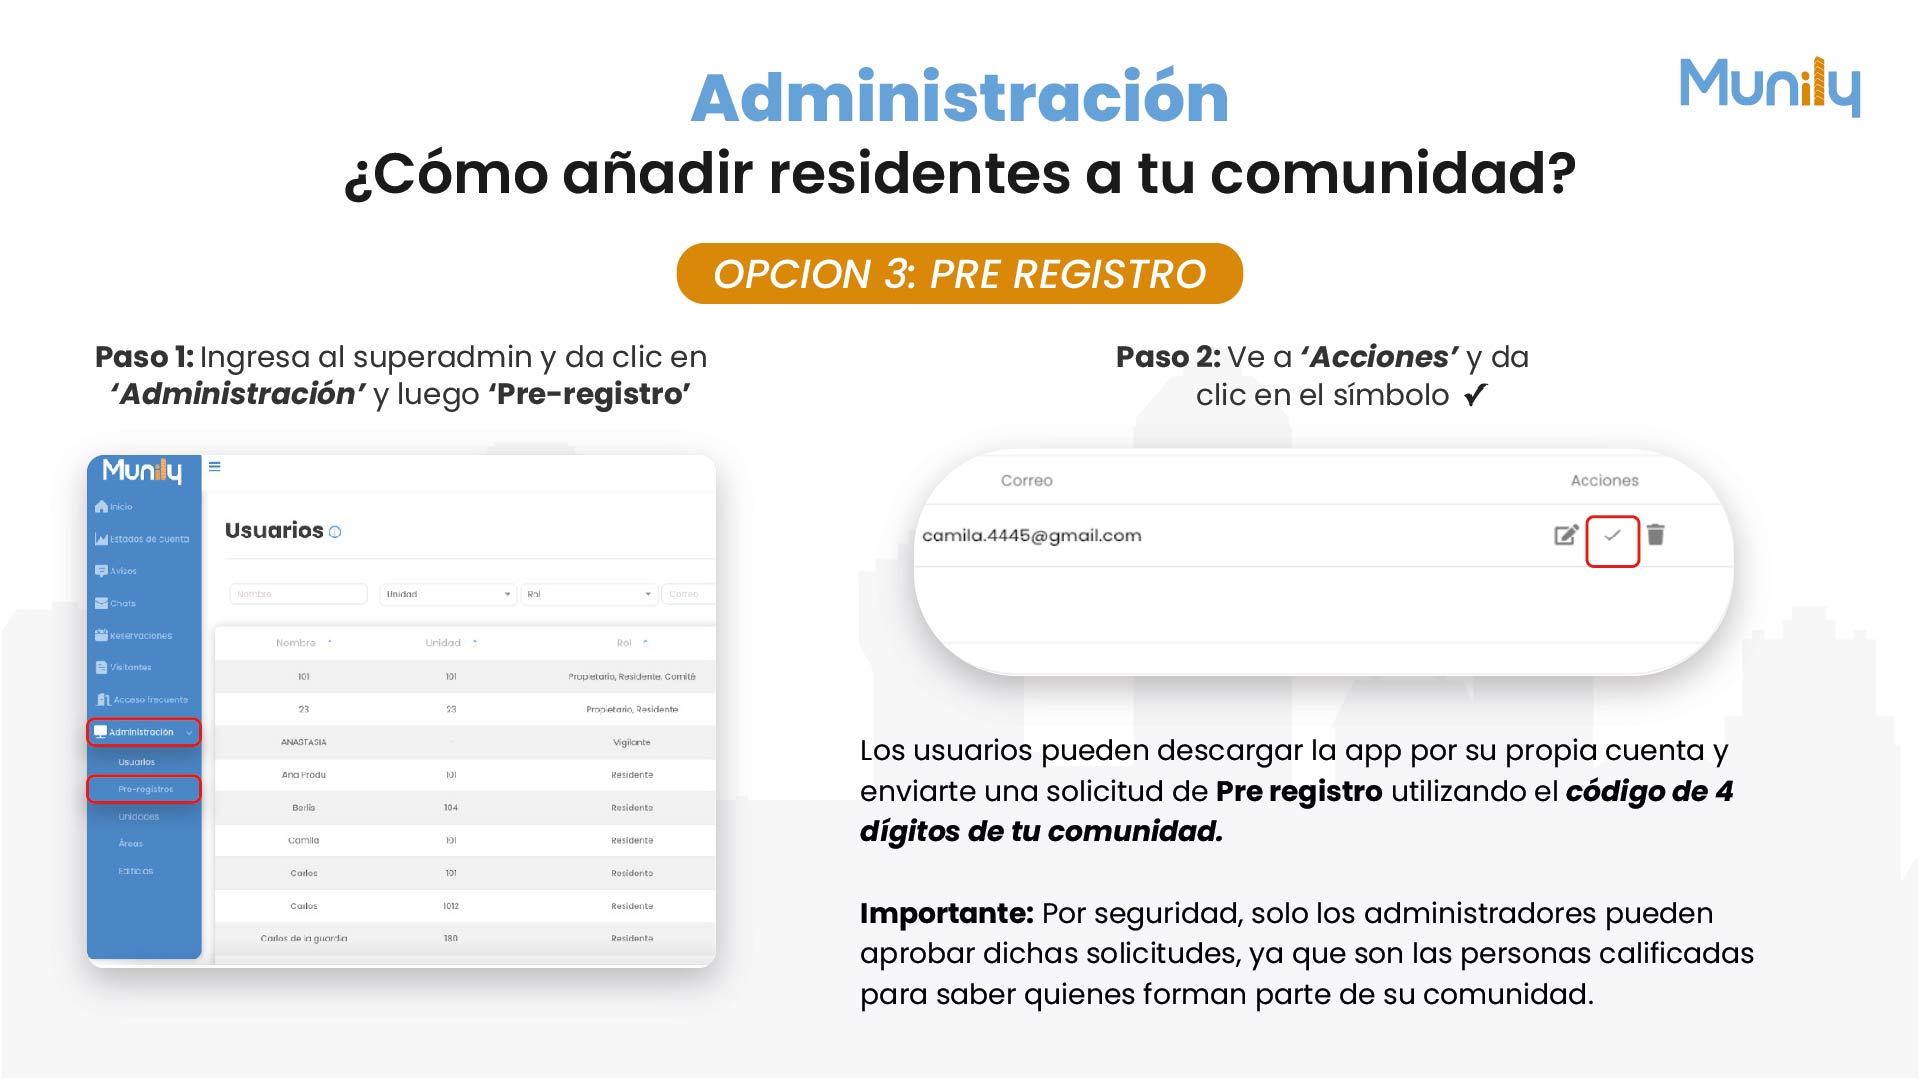
OPTION 3: PRE-REGISTRATION
Step 1: Log in to Superadmin, click “Administración,” and then “Pre-registration”
- In the left-hand side menu, look for the Administración option.
- When the “Administración” options appear, select Pre-registros (Pre-registrations).
Step 2: Go to “Actions” and click the checkmark (✓)
- In the user table, locate the row for the resident you want to approve.
- In the Actions column, you’ll see several icons. Click the icon that looks like a checkmark inside a box.
Additional Information:
Users can download the app on their own and send you a pre-registration request using your community’s 4-digit code.
Important: For security reasons, only administrators can approve these requests, as they are the ones qualified to know who is part of their community.
Guide images
Still need help? Reach us on WhatsApp or at soporte@munily.com.
Con Amor 💙 Munily