

How do you create an amenity? 🥅🛝🏓
Here's how to create an amenity in your community using the Munily app.
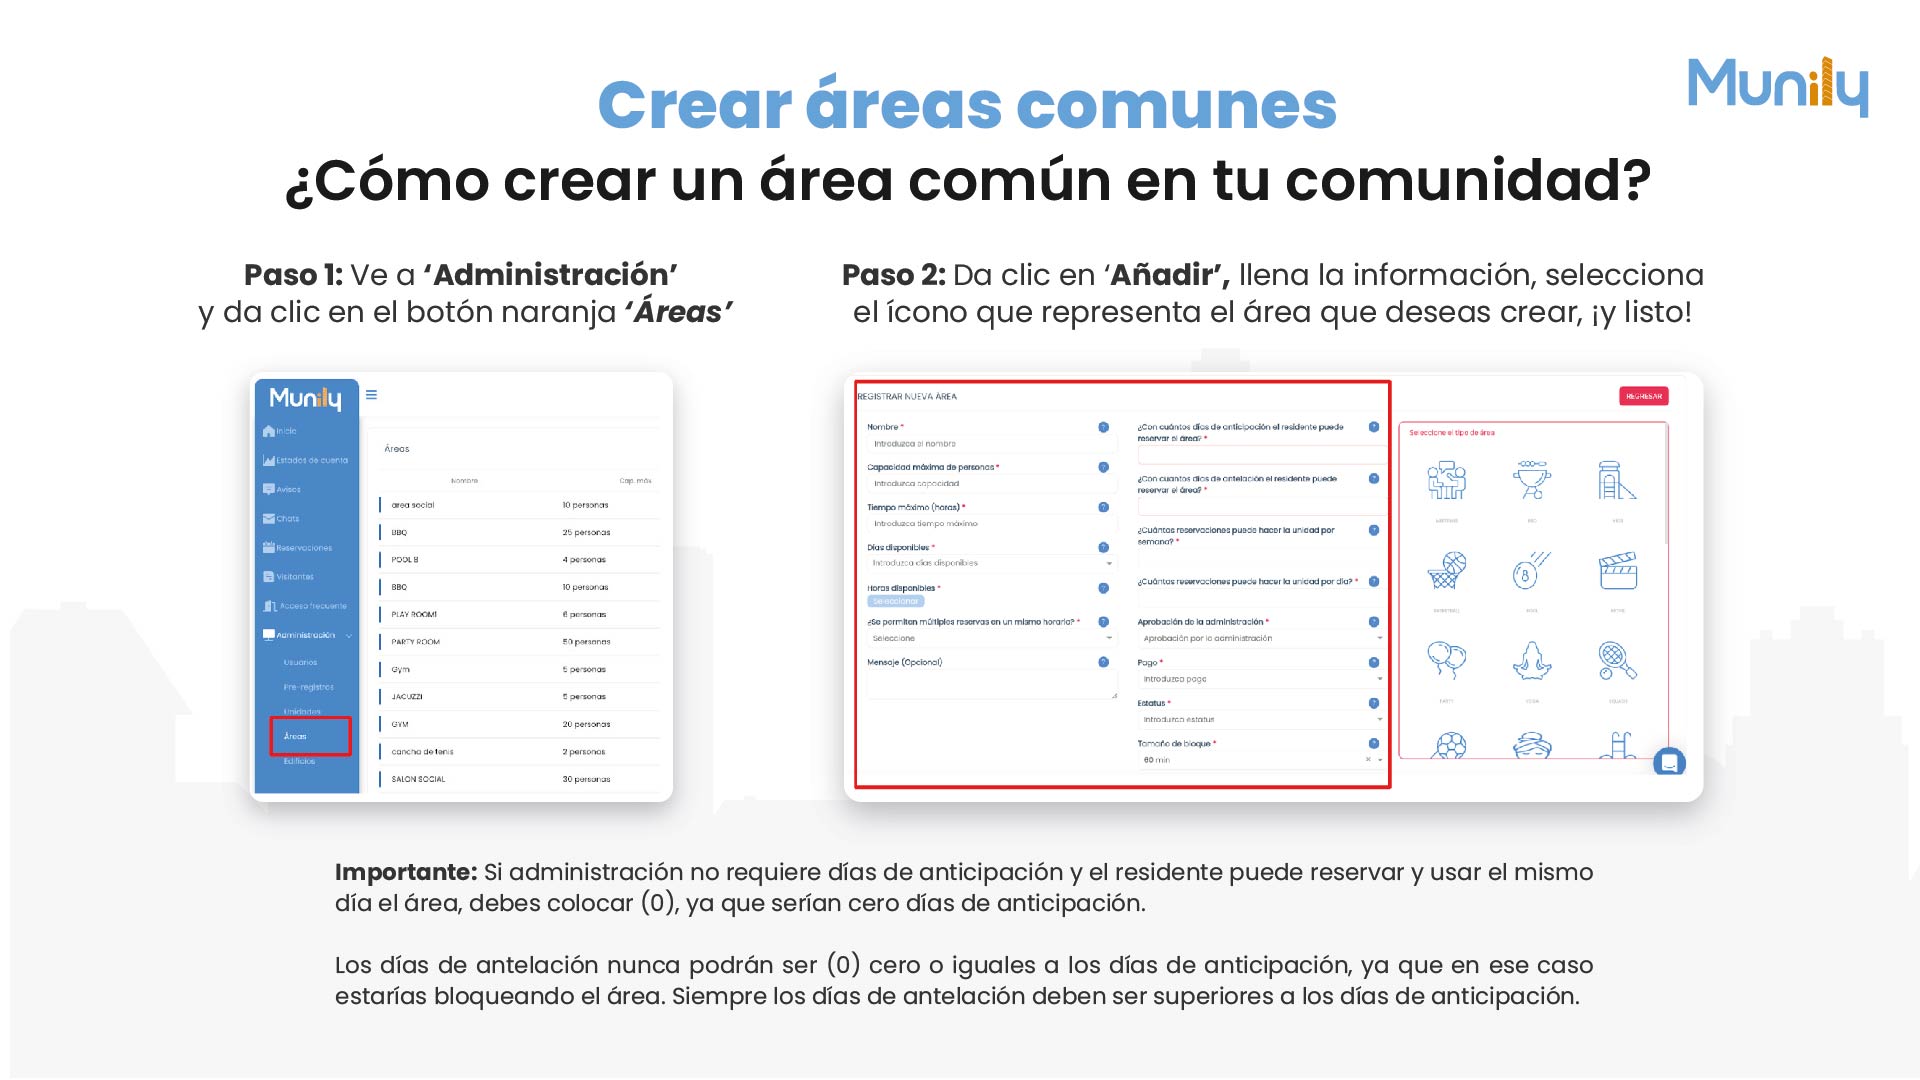
Step 1: Go to the "Administración (Administration)" section
- In the left-hand side menu of the app, find and click the "Administración" option.
- Once in “Administración,” locate and click the orange button that says “Áreas (Areas)”.
You’ll see a list of the existing amenities in your community.
Step 2: Create a new amenity
In the areas section, click the "Add" button (located at the top right of the list of areas).
A form will open for registering a new area. Fill in the following information:
- Name: Enter the name of the area you want to create (e.g., “Party Room,” “Gym”).
- Maximum Capacity: Enter the maximum number of people who can use the area at the same time.
- Maximum Duration (hours): Specify the maximum amount of time a resident can reserve the area in a single reservation.
- Available Days: Here you can set the days of the week when the area will be available for reservations.
- Available hours: Select the time slots during which the area can be reserved.
- Are multiple reservations allowed during the same time slot?: Select whether a resident can make multiple reservations for the same time slot.
- Message (Optional): You can add an informational message for residents regarding the use of the area.
- How many days in advance can a resident make a reservation for the area?: Specify how many days in advance a resident can make a reservation.
- How many days in advance can a resident make a reservation for the area?: (This field appears to be a duplicate of the previous one; be sure to enter the correct information.)
- How many reservations can a unit make per week?: Set the limit on the number of reservations a residential unit can make per week.
- How many reservations can a unit make per day?: Set the limit on the number of reservations a residential unit can make per day.
- Property Management Approval: Indicates whether reservations for this area require approval from property management.
- Payment: If there is a fee for using the area, you can enter the payment information here.
- Status: Select the current status of the area (e.g., "Active," "Inactive").
- Block Size: Sets the minimum time duration for reservations (e.g., 30 min, 1 hour).
Select the area type: Below the information fields, you’ll find a section called “Select the area type.” Here, click the icon that best represents the amenity you’re creating. Several options are available, such as:
- Building with people (for social or gathering areas)
- Swimming pool
- Tennis court
- Basketball court
- Game room
- Movie theater
- Gym
- Yoga
- Racquet sports
- Soccer
- Hot tub
- Other icons representing different types of areas.
Once you’ve filled in all the information and selected the icon, click the "REGISTER" button (located in the upper-right corner of the form).
Important:
- If property management does not require advance notice for a reservation of an area and the resident can make a reservation and use it on the same day, you must enter (0) in the “days in advance” field. This means zero days in advance.
- The “days in advance” field can never be (0) or equal to the number of days in advance, since in that case you would be blocking the area. The “days in advance” field must always be greater than the number of days in advance.
Guide images
Still need help? Reach us on WhatsApp or at soporte@munily.com.
Con Amor 💙 Munily