

Qpass Dashboard: How to Create One-Time Access Passes in Your Community?
Create one-time access passes for your community!
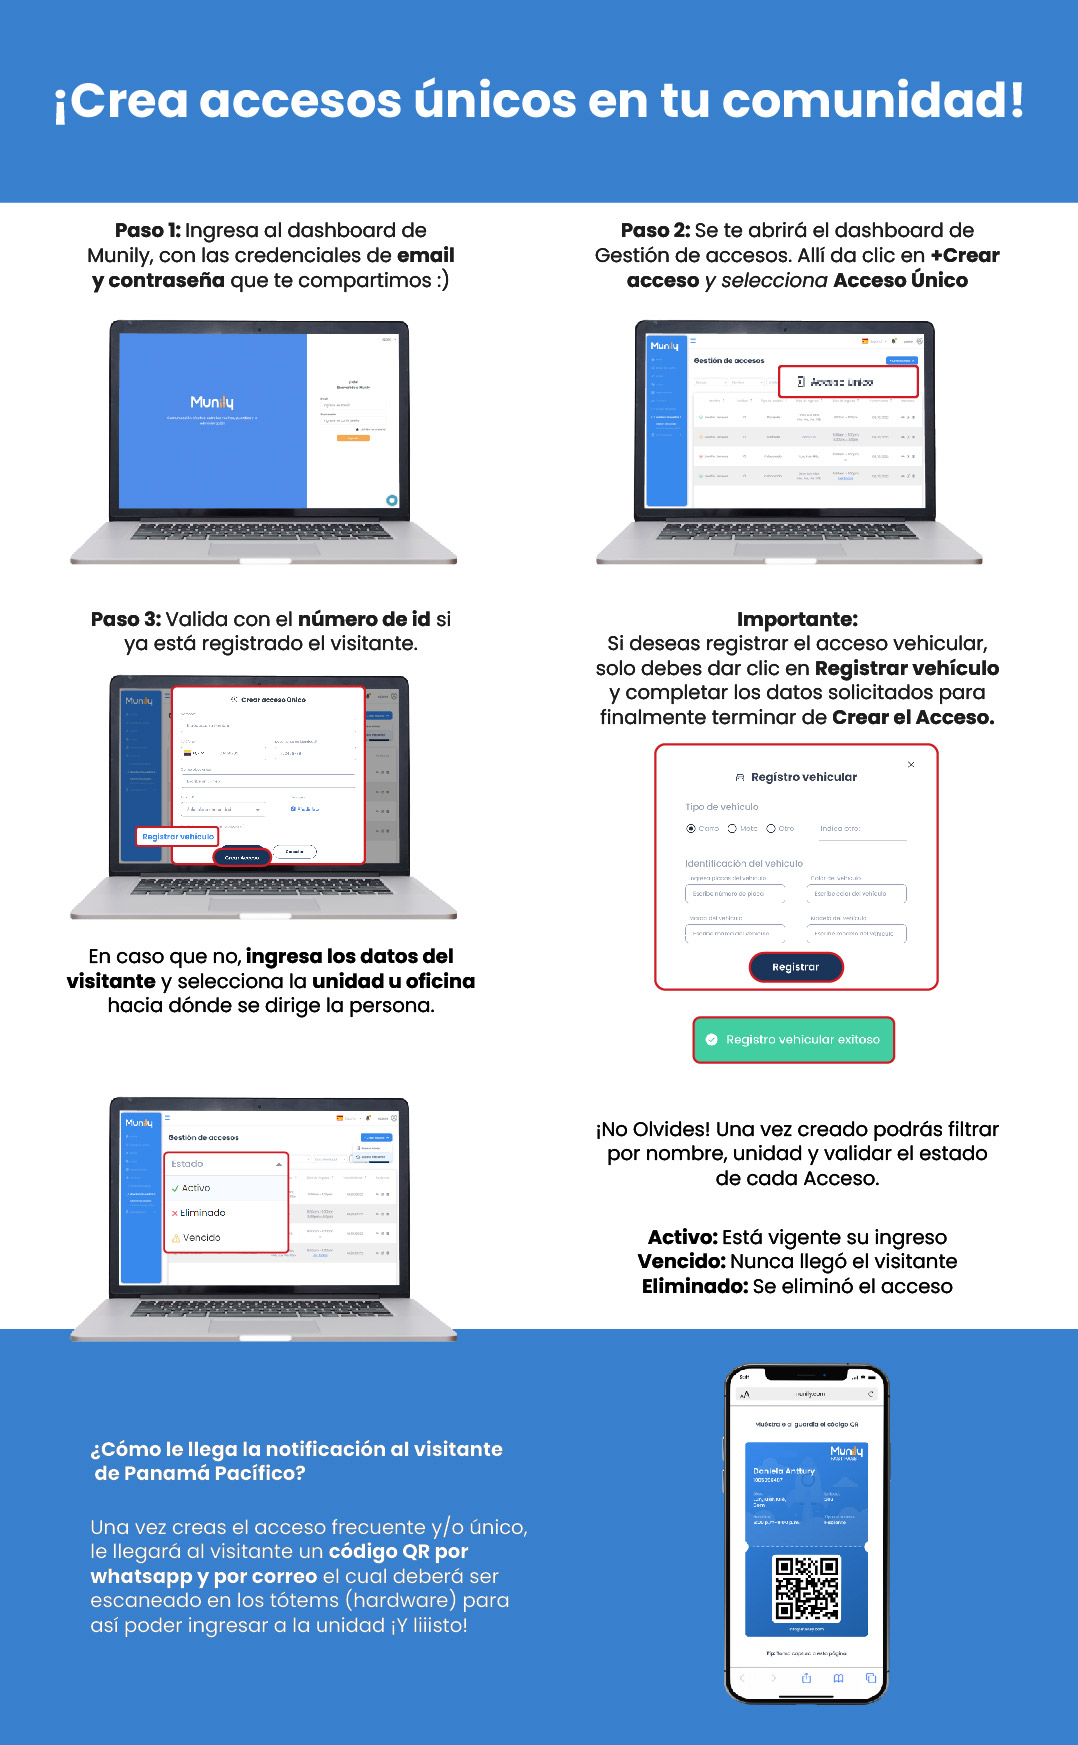
Step 1: Log in to the Munily dashboard using the email and password we shared with you :)
- You’ll see the Munily login screen. Enter your email address and password.
Step 2: The Gestión de accesos (Access Management) dashboard will open. There, click “+Create Access” and select “One-time access pass.”
- On the main “Gestión de accesos” screen, find and click the “+Create Access” button.
- A drop-down menu will appear. Select the “One-Time Access Pass” option.
Step 3: Verify whether the visitor is already registered using their ID number.
If the visitor is already registered, you can verify them by entering their ID number.
If you want to register vehicle access, simply click Register Vehicle and fill in the requested information to finally complete Create Access.
- Vehicle Registration:
- Vehicle Type: Select from "Car," "Motorcycle," or "Other."
- Photo Index: (Field to enter additional information, if applicable).
- Vehicle Information:
- License plate number.
- Vehicle make.
- Vehicle model.
- Vehicle color.
- Chassis number.
- Engine number.
- Click the Register button.
- You will see the message: Vehicle registration successful.
- Vehicle Registration:
If the visitor is not registered, enter the visitor’s information and select the unit or office the person is visiting.
Don’t Forget! Once created, you can filter by name, unit, and check the status of each access.
- Active: The visitor’s access is valid.
- Expired: The visitor never arrived.
- Deleted: The access has been deleted.
How does the visitor at Panama Pacífico receive the notification?
Once you create a frequent access pass and/or a one-time access pass, the visitor will receive a QR code via WhatsApp and email, which must be scanned at the access kiosks (hardware) to enter the unit. And that’s it!
Guide images
Still need help? Reach us on WhatsApp or at soporte@munily.com.
Con Amor 💙 Munily