

What is the process for having visitors sign before taking a photo of their ID during the registration process? 👮🏻♀️📢
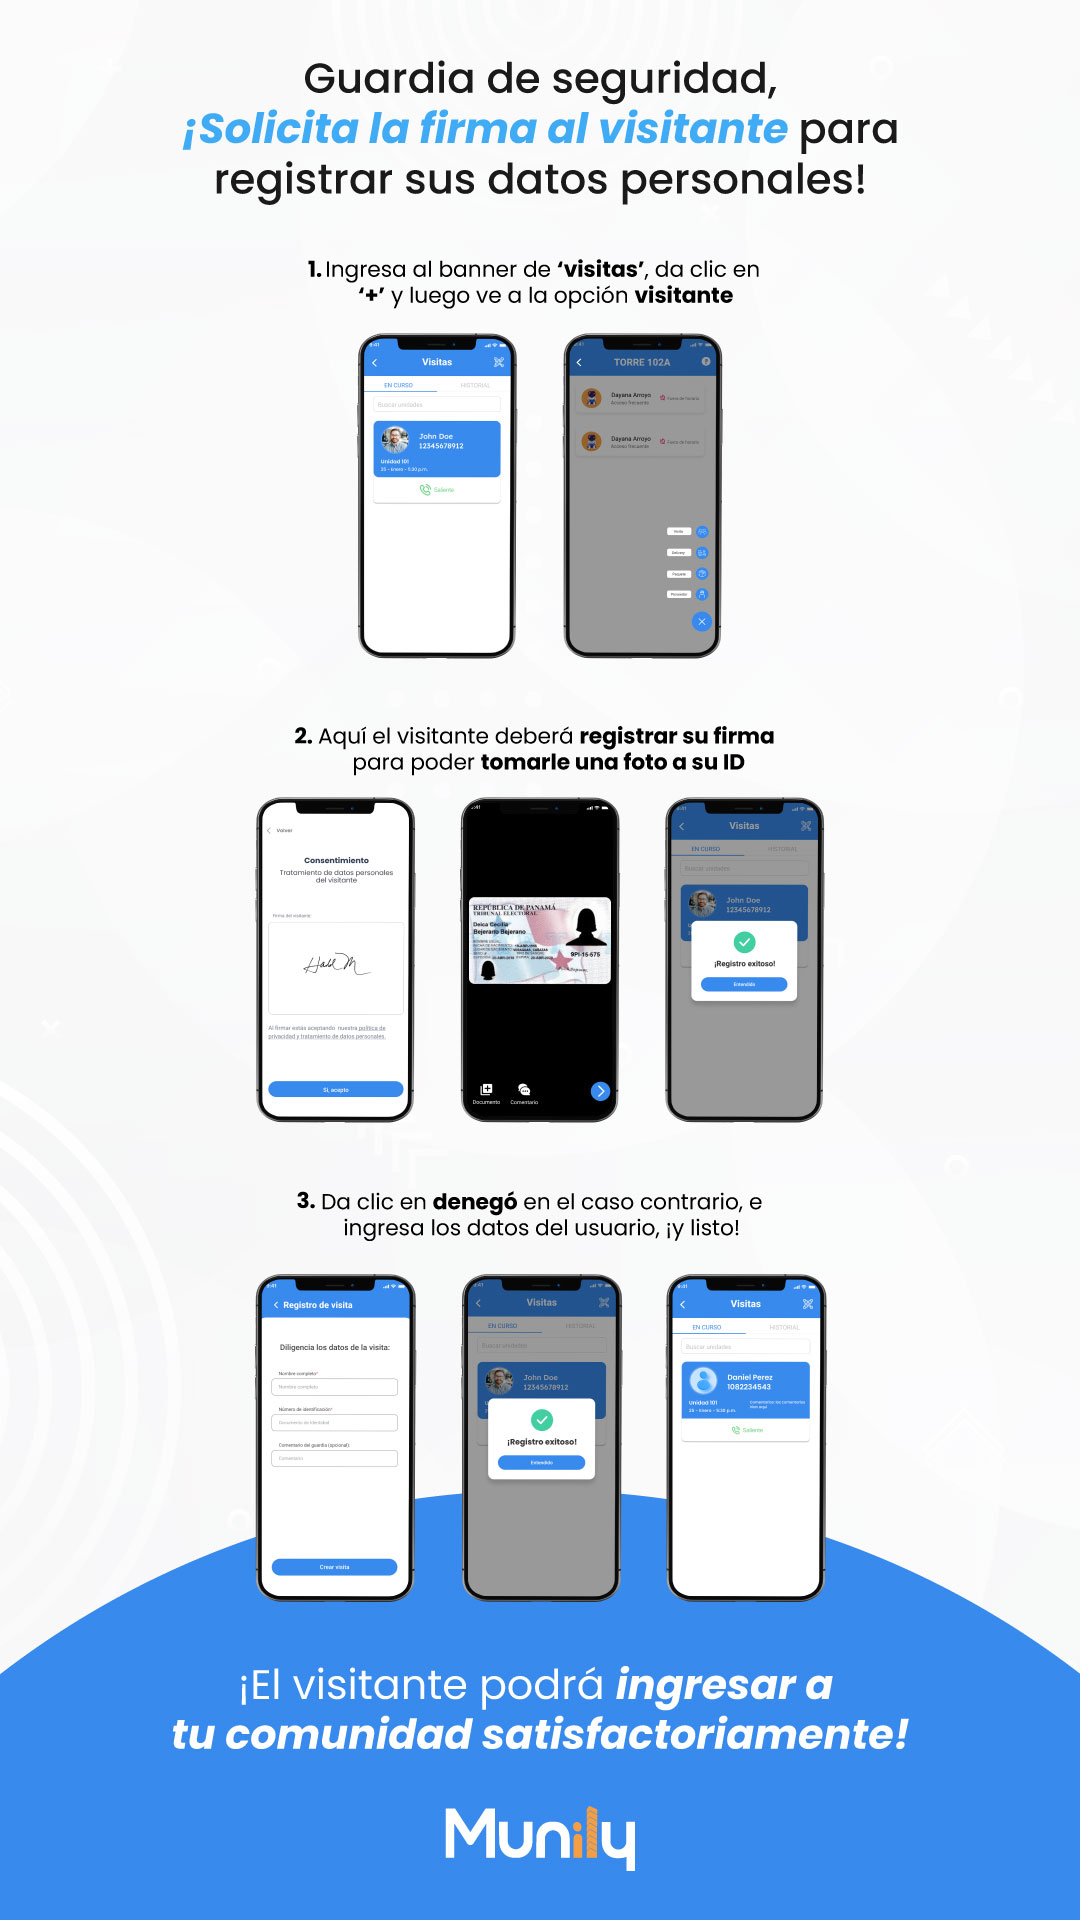
Here’s how to request a signature from your visitors before taking a photo of their ID, ensuring a complete and secure record:
1. Go to the “Visitas (Visits)” banner and add a new visitor.
- On the app’s main screen, locate and select the banner that says “Visitas”.
- Once inside the visitor section, you’ll see a button with the “+” symbol. Click it.
- Next, choose the 'Visitor' option to begin registering a new visit.
2. The visitor must provide their signature so you can take a photo of their ID.
- On the screen that appears, the visitor must read the 'Consent' statement regarding the processing of their personal data.
- Below the consent text, they will find a space to sign. The visitor must use their finger or a stylus to sign their name in the designated area.
- Once the visitor has signed, they must click the 'I Agree' button to continue.
- The visitor will then be asked to present their ID so the app can take a photo of it.
- After the ID photo is successfully captured, a message will appear stating 'Registration successful!'.
3. If registration was denied, enter the user’s information manually.
- If automatic visitor registration is unsuccessful (for example, if the ID could not be read or the signature was invalid), you’ll need to proceed manually.
- Click the 'Declined' option (or a similar option indicating manual registration).
- A form titled 'Visitor Registration' will open. Here, you’ll need to fill in the visitor’s information:
- Full Name
- ID number
- Phone number
- Apartment
- Security guard’s comment (optional)
- Comment
- Once you’ve filled out all the required fields, click the 'Create Visit' button.
The visitor will now be able to enter your community!
Guide images
Still need help? Reach us on WhatsApp or at soporte@munily.com.
Con Amor 💙 Munily